How to Do Named Entity Recognition Python Tutorial

Named entity recognition (NER), or named entity extraction is a keyword extraction technique that uses natural language processing (NLP) to automatically identify named entities within raw text and classify them into predetermined categories, like people, organizations, email addresses, locations, values, etc.
A simple example:

Try out our free name extractor to pull out names from your text.
Using NER, you can automate endless tasks, with almost no human intervention. Read on to learn how to perform information extraction with Python in just a few steps.
How to Do Named Entity Recognition with Python
MonkeyLearn is a SaaS platform with an array of pre-built NER tools and SaaS APIs in Python, like person extractor, company extractor, location extractor, and more.
Sign up to MonkeyLearn for free and follow along to see how to set up these models in just a few minutes with simple code. And, later, we’ll show you how to create a custom model and call it with Python in five easy steps.
1. Install MonkeyLearn Python SDK
The API tab shows how to integrate using your own Python code (or Ruby, PHP, Node, or Java). We’ll start performing NER with MonkeyLearn’s Python API for our pre-built company extractor. The API will access the extractor automatically:
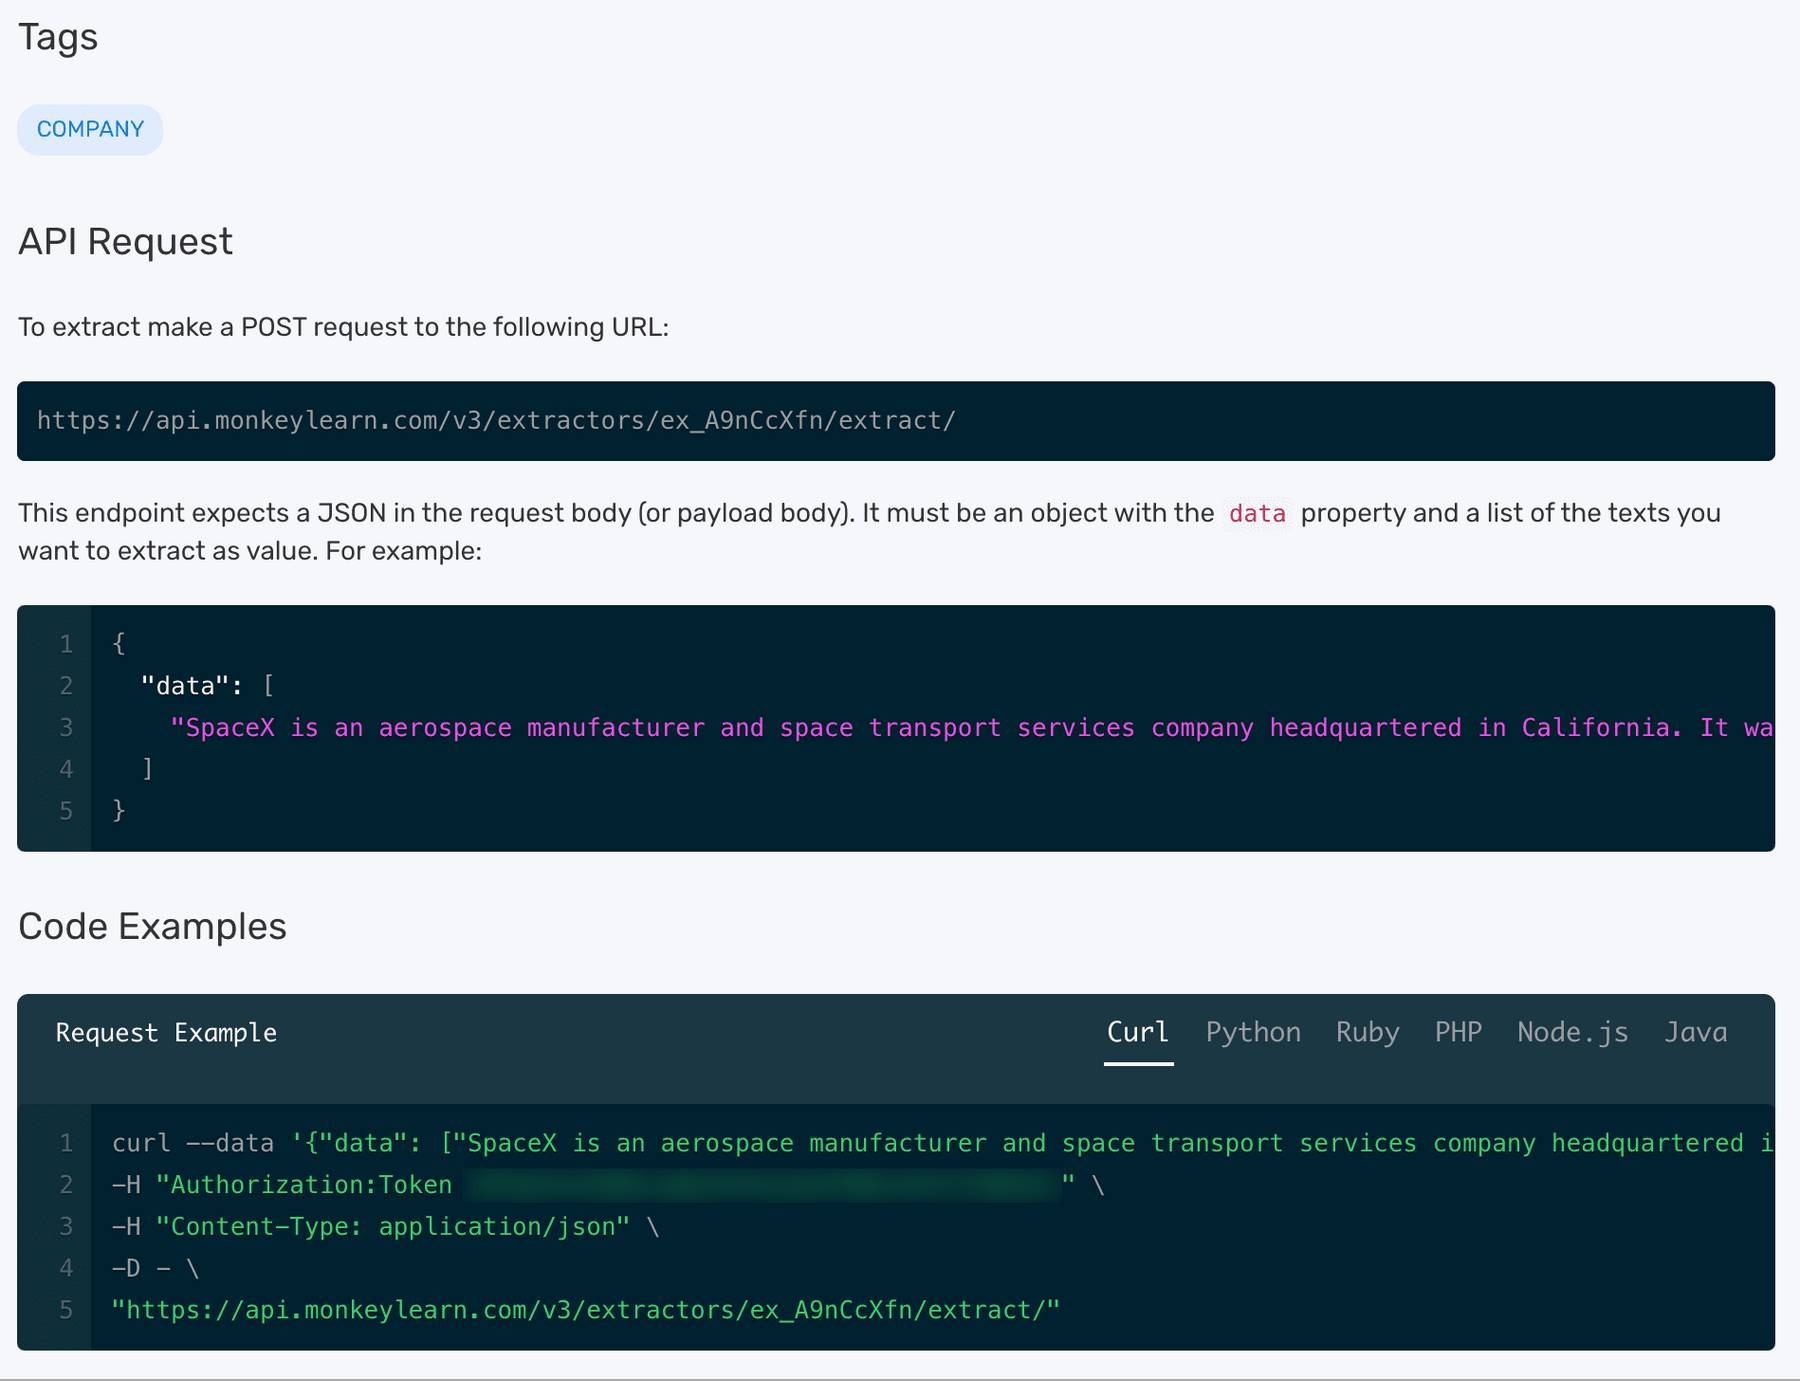
You can send plain requests to the MonkeyLearn API and parse the JSON responses yourself, but MonkeyLearn offers easy integration with SDKs in a number of languages.
Sign up to get your API key then download and install the Python SDK:
pip install monkeylearn
2. Run your NER model
Now that you're set up, enter the below to start running MonkeyLearn’s NER analysis:
from monkeylearn import MonkeyLearn

ml = MonkeyLearn('<<Your API key here>>')
model_id = 'ex_A9nCcXfn'
data = ['first text', {'text': 'SpaceX is an aerospace manufacturer and space transport services company headquartered in California. It was founded in 2002 by entrepreneur and investor Elon Musk with the goal of reducing space transportation costs and enabling the colonization of Mars.', 'external_id': 'ANY_ID'}, '']
response = ml.extractors.extract(model_id, data=data)

print(response.body)
You can try out other models by changing the model ID. Find model IDs on your MonkeyLearn dashboard. Select the model you want, click ‘Run’, _then ‘API’_. You’ll see the ID at the top of the page.
3. Output your model
The output will be a Python dict generated from the JSON sent by MonkeyLearn – in the same order as the input text – and should look something like this:
[
    {
        'text': 'first text',
        'external_id': None,
        'error': False,
        'extractions': []
     }, {
        'text': 'SpaceX is an aerospace manufacturer and space transport services company headquartered in California. It was founded in 2002 by entrepreneur and investor Elon Musk with the goal of reducing space transportation costs and enabling the colonization of Mars.',
        'external_id': 'ANY_ID',
        'error': False,
        'extractions': [{
            'tag_name': 'COMPANY',
            'extracted_text': 'SpaceX',
            'parsed_value': 'SpaceX',
            'count': 1
        }]
    }, {
        'text': '',
        'external_id': None,
        'error': True,
        'error_detail': 'Invalid text, empty strings are not allowed',
        'extractions': None
    }
]
Now you’re set up to perform NER automatically. You can change the models to try out something new or create your own model, then call it with Python. Follow below to create your own model.
Create Your Own Named Entity Recognition Model
To get the most out of entity extraction, we’ll show you how to build your own extractor. Follow along to train your model with our sample data set or upload your own. You’ll see how training your model with examples relevant to your field and company will help you get the most out of text extraction.
Creating a custom NER model with MonkeyLearn is really simple, just follow these steps:
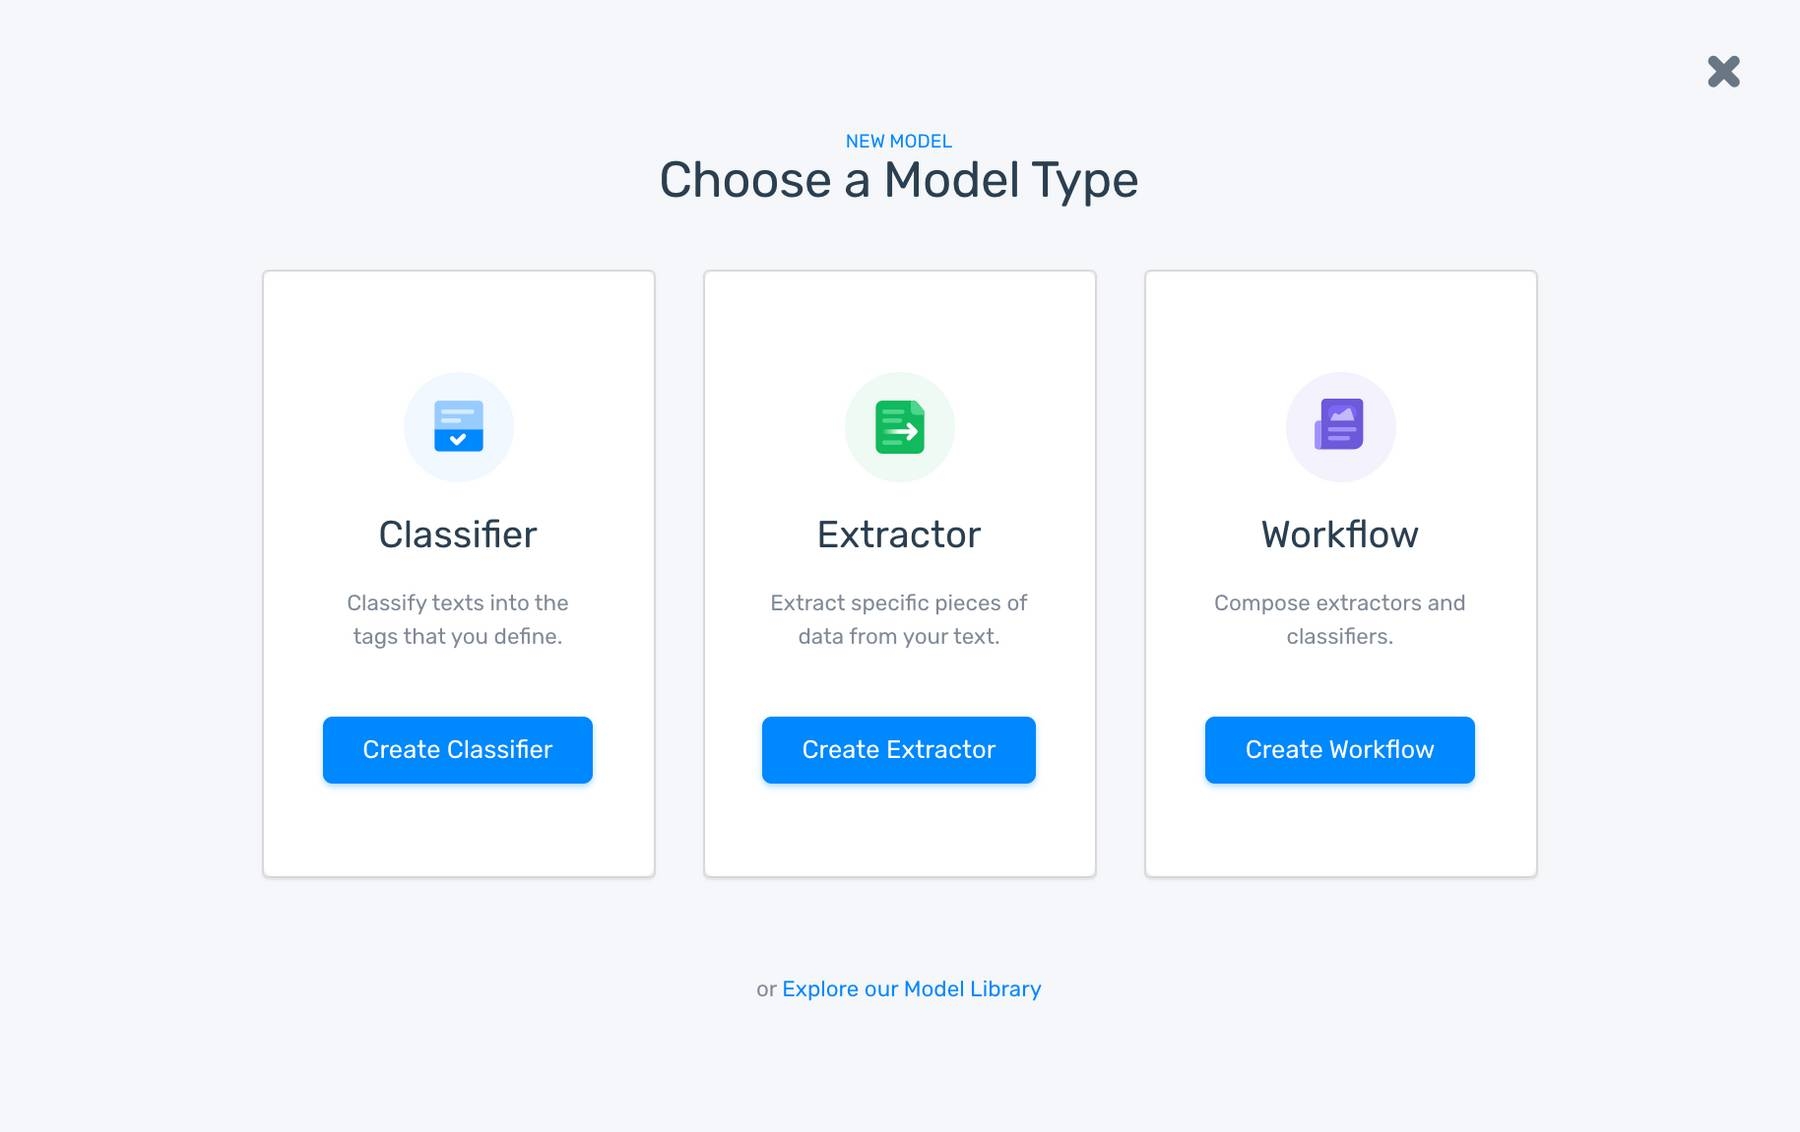
1. Create a new model.
Sign up to MonkeyLearn for free, click ‘Create Model’ and choose ‘Extractor’_.
2. Import your data
You can upload a CSV or excel file, connect to an app, or use one of our sample data sets. We’ll be using ‘Laptop Features’ CSV from the MonkeyLearn data library.
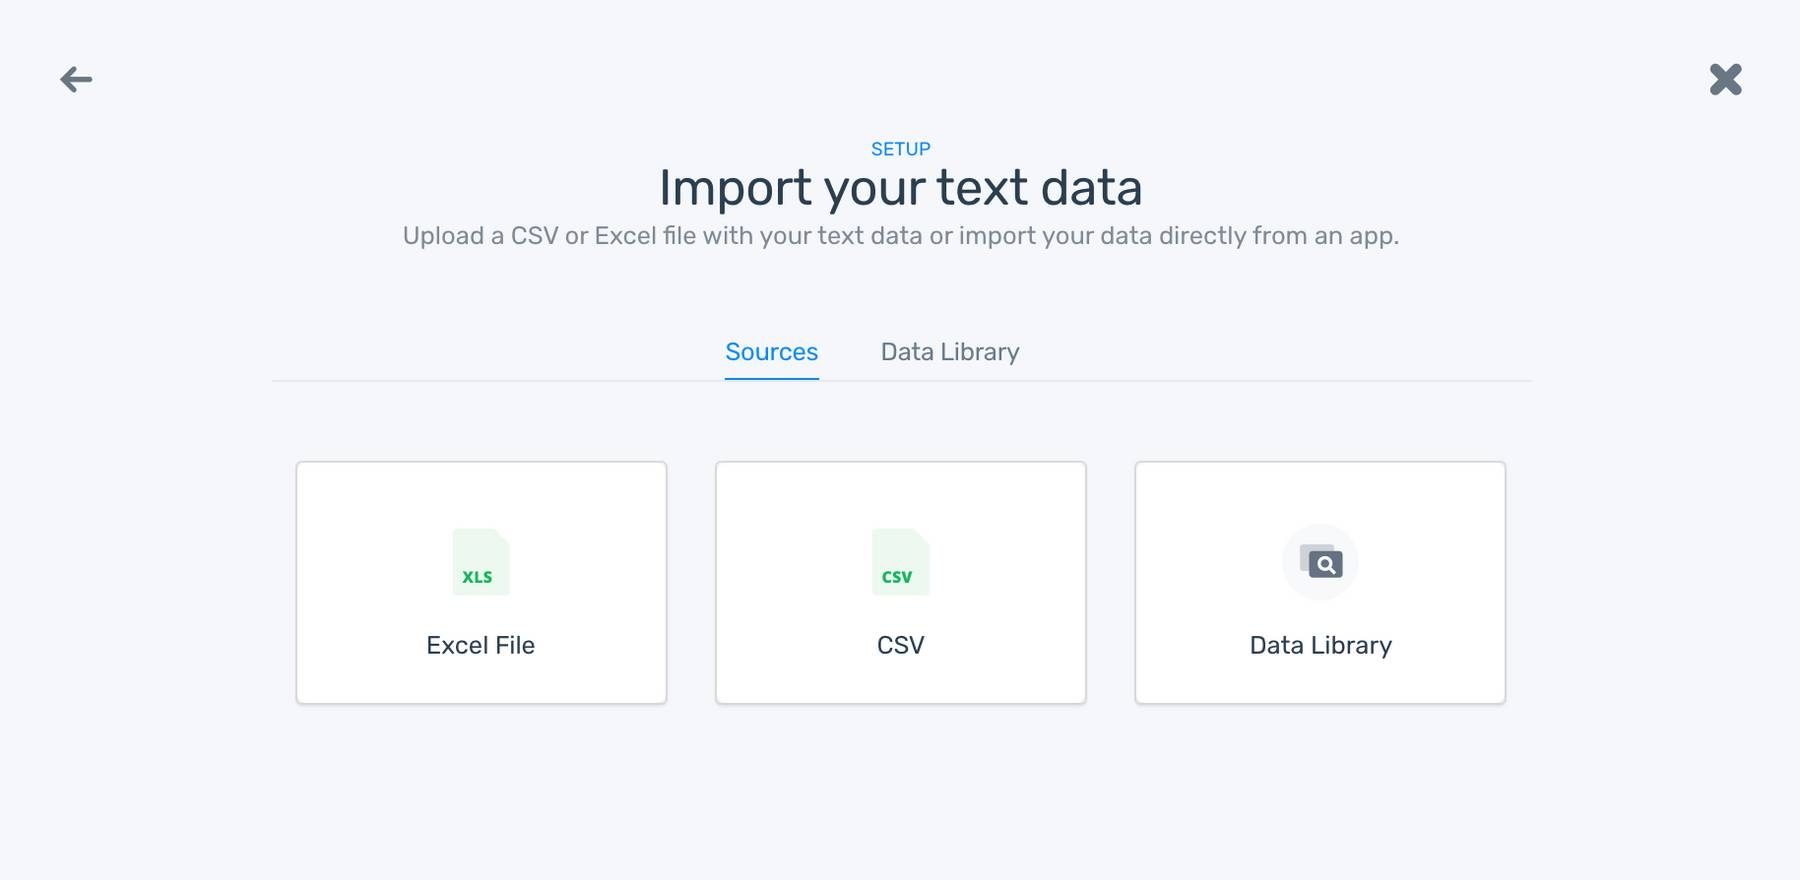
Select the column with the data you’d like to use to train your model. ‘Laptop Features’ only has one column, so no need to select.

3. Assign your tags
These are the categories that will define your named entities. Enter at least one, you can add more later.

4. Start training your model
Manually tag relevant words by selecting a tag from the right, then the words that match that tag in the text. You have to tag several examples to properly train your model. After you’ve tagged a few, you’ll notice the model will start making predictions. Correct the tag, if your model has tagged incorrectly.
If multiple words/numbers make up a single tag, you may need to hold ‘Option’ while you select text with spaces in-between. It’ll figure it out after a while.
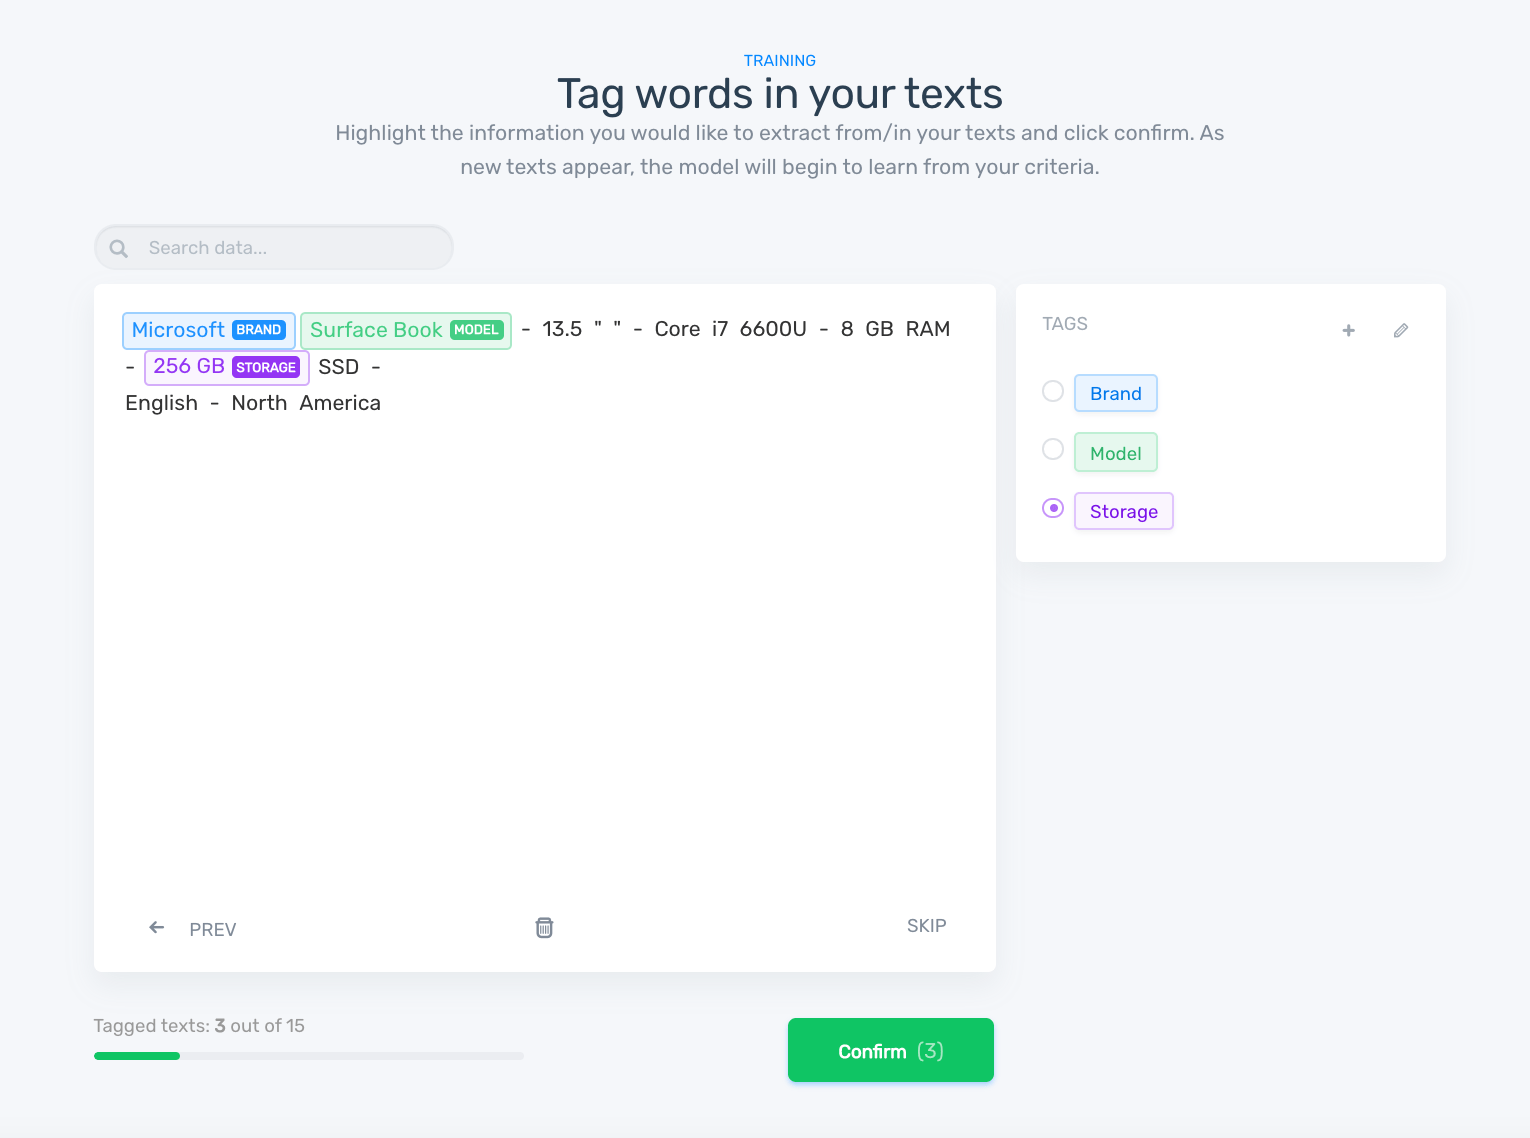
Once the model has been trained, you’ll be prompted to name it. Enter a name, then you can click through to test it. You can enter text directly in the box or cut and paste. Click ‘Extract Text’ to test.

The more you train your model, the better it will perform. NER models generally become well-trained pretty fast.
5. Connect your model with Python API
It’s time to put your model to work. Now that you’ve trained your entity extractor, you can start analyzing data. You can upload a file for batch processing, connect to the API, or try one of our available integrations.
Connect your model with this simple code:
from monkeylearn import MonkeyLearn

ml = MonkeyLearn('<<Your API key here>>')
model_id = '<<Model ID>>'
data = ['first text', {'text': <<Text Example>>, 'external_id': 'ANY_ID'}, '']
response = ml.extractors.extract(model_id, data=data)
Take a look at our docs for full documentation of our API and its features.
Wrap Up
Now that you’ve learned about MonkeyLearn NER with Python, you can use MonkeyLearn’s APIs to perform NER on almost any text you can think of. Or expand your horizons into topic classification, sentiment analysis, keyword extraction, and more.
You can implement MonkeyLearn NER and text analysis with low-level coding, or get more in-depth, if needed. Create custom models with our simple interface or directly in Python.
Need helping making a decision? Find out if we're the right fit for your business.

Tobias Geisler Mesevage
May 11th, 2020


